Wednesday, October 2, 2013

LBD - Project Sewn Sewalong

Project Sewn is a 4 week sewing competition comprising six designer/sewists who are all given a theme each week to base their looks on.  They are then scored by their fellow competitors and are opened to an online popular vote.  At the end of the voting period the votes are tallied and based on this combined score. One designer is sent home and one is announced a winner for each week.
Along with the "professional" competition there is also a little sewalong for anyone to enter based on the same theme the designers have each week.
I'm definitely going to sew along with this one. I need to use a lot of my stash so I'm making a personal vow to myself to only use fabric and supplies that I have on hand already and to sew along each week not just enter something I've already sewn. Update: Broken vow in Week 2. Entered something I made up last month as my mum is in town and I need to spend some QT with here.


Week number one is the LBD. The little black dress is an essential part of any woman's wardrobe and guess what? I didn't have one! 
I was pretty happy when I sorted through my stash box and found the following:

Black Silk Shantung which I picked up from Lincraft. I remember it was a little pricey so I'm glad I'm finally using it.
Black lining and a 20cm of a black sequin fabric (no idea why I bought this)
Pattern V8555 I picked up when Spotlight had one of those $5 pattern deals on. I thought it looked like a nice staple pattern to have in my collection.
Black zip. 

Wow, I had everything. No need to take a trip to the fabric store which is great as I would end up coming home with another purchase which has nothing to do with the LBD challenge.


The pattern is V8555 which I checked out on Pattern review. They all looked amazing and had great reviews so definitely worth sewing up.

The Silk shantung creases easily and I had it folded for a while in a box so I had a lot of pressing to do before I started. Also worth noting is that it frays a lot. I decided to use a black sequin fabric for the midriff section which adds a nice sparkle and bit of glamor but it was very bulky and slippery. I made sure I tacked everything in place before sewing and it worked really well. I trimmed back the seams a lot to reduce the bulk. 


I really liked sewing this pattern, it was easy and fits well. I didn't realise that a normal dress zipper was to be inserted and had sewn the CB seam already before reading this instruction.  I didn't want to ruin the look of the dress by machine stitching the dress zip in so I used the couture method of stab stitching. This requires lots of tacking in place first. But, I'm so glad I did as it turned out beautifully. I will definitely use this method again. You can really manoeuvre the zipper so it fits perfectly.

What I really love about this LBD is that it reminds me of those gorgeous 50's style dresses like Audrey Hepburn used to wear. All I need now are some long gloves and pearls. Actually, you might notice I'm wearing pearls. They are a little present my 8 year old son gave to me for mothers day. He bought them from his School for $1! He is always asking why I don't wear them, so now I can show him that I think they are special enough to wear with my special dress.


           Now I have a little black dress in my wardrobe and I've used a fair chunk of my stash,                                                                             thankyou ProjectSewn.


    To reinforce the seam with the slit I made seam binding out of the 
silk shantung 


 I used the couture method of stab stitching for the zipper which
 required three rows of tacking


 The midriff was challenging as I had four layers of fabric, lining,
interfacing, sequin fabric and main fabric.


You can vote here form my dress in the competition. I am number 12.
Thanks!


Wednesday, September 25, 2013

Recycled Pillowcase Halloween Treat Bags

It's only been the last few years where Halloween has taken off in Australia. We never used to celebrate it as children back in the "Old Days".  My kids were keen last year after our neighbours dropped an orange balloon and a note in our box asking if we were interested in participating to put the balloon out the front of our house. What a great idea.
As I am new to Halloween I hadn't really prepared so I whipped out the face paint, a cat mask and a tee which I sewed earlier for a Cat in the Hat costume. The rest of the kids came out looking smashing and off they went. I soon realised I hadn't given them anything to collect the treats in and shoved a few plastic bags in their pockets. They did the job but I decided this year I would do better.
I have loads of old pillowcases at the moment that were donated by St Kilda Mums as they can't use them for health and safety reasons. I am using them to make dresses, buntings, aprons and anything else I can think of for the up and coming St Kilda School Fete
Whilst researching "recycled pillowcases" I came up with a few posts on Halloween Treat Bags!! What another great idea. I decided to test them out. They are very simple and I think look fab.
 Firstly, cut a potato in half and carve out a triangle shape. Get some orange fabric paint and dip it in.
Get an old pillowcase, preferably white or a light colour. Put a piece of paper inside so that the paint doesn't come through onto the other side and stain your table (I figured this out quickly). Come up with any design you like for the pumpkin and stamp away.  I let my kids do the stamping and they decided on eyes, nose and scary teeth! You can paint a shape like a pumpkin or just leave it with the stamps. Let the pillowcase dry overnight on a flat surface and press on the wrong side when it is dry to set the paint.
 Meanwhile make the tie. Luckily, I had some old orange tee fabric and an old black tee. I cut strips, braided it and made a tie.
Now here is where your sewing skills come in. Before making the casing for the tie sew two button holes big enough to thread your tie through at the top and in the centre of the pillowcase. Fold over and sew around creating about a 5cm casing. Thread your tie through using a big safety pin.
Ta Da! A BIG treat bag for Halloween.


Saturday, September 14, 2013

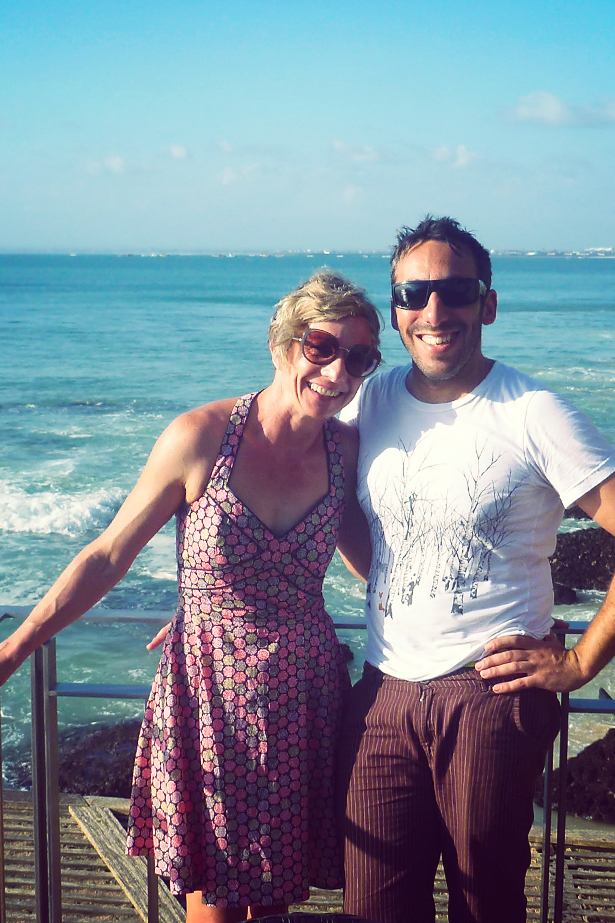
Bali 50's style

Update 8th October: I have entered this dress in week 2 of the Project Sewn competition. You can vote here.


As you can see from this post I am not in the midst of a cold Melbourne winter, I am in fact in balmy Bali on a family holiday. My sister had a significant birthday (fifty, ouch) and invited family and friends to join her in Bali. Of course we jumped at the chance to join her celebrate. We have had a fantastic time here on the beaches, in the pool and just generally relaxing. Perhaps a few too many G&T's and Nasi Gorengs but I'll worry about that when I return home.
About a week before we came over I noticed I had a little summer dress cut out in my UFO box (unfinished objects). I had cut it out almost a year ago and didn't bother to get started on it. After all the sewing I've been doing for the School fete lately I wanted to do something for myself and something quick. This was the perfect project.

The fabric is a gorgeous Liberty of London Tana lawn from Tessuti Fabrics called Red Stefan. It is 100% cotton and a bit pricey but once you start sewing with it and wearing it as I have now found out you won't be at all worried about the price of it. It is soft and beautiful to sew.

I used a Burdastyle pattern 50's Halter Dress edition 07/2012 style #133. This dress pattern was first published in burda Modern (now burda style magazine) back in 1950. The instructions are a little tricky to follow but if you are not a complete beginner you will figure it out pretty easily by looking at the picture provided. The trickiest part being the insertion of the piping into the band on the bodice. It's actually quite easy to do but the instructions use too many complicated words which just confuse you. Remember just follow the picture! I only had 1.5mtrs and not the required 2 mtrs  so I altered the skirt to be just slightly narrower than a full circle. It worked just fine.

I used the smallest size but due to my depressingly small bust  and I still had to shave a few mm's off the upper bust line. It still needs a bit of filling out which was fixed by using a very padded bra. Who needs a boob job!
The bodice is lined in the same manner as the outer bodice which I really loved. It has a real 50's look about it with the pointy boobs and small waist. The halter really accentuates this too and I love the piping detail. 


I hadn't quite finished it before we boarded the plane to Bali so I grabbed the needle and thread and packed in in my suitcase. I figured it would be a perfect dress for Bali. All I need to do was hem and hand stitch the lining in which I finished in our outdoor lounge area in the villa. It was such a different sewing experience, bikini on and needle and thread in hand!

Highly recommended pattern and fabric.

This trip also happened to coincide with mine and Tony's anniversary of 14 years together which we celebrated at the Rock Bar in the beautiful Ayanya Resort. It was gorgeous watching the sun go down and sipping Lychee Martinis and the dress looked perfect!